

- BY
- POSTED IN Uncategorized
- WITH 0 COMMENTS
- PERMALINK
- STANDARD POST TYPE
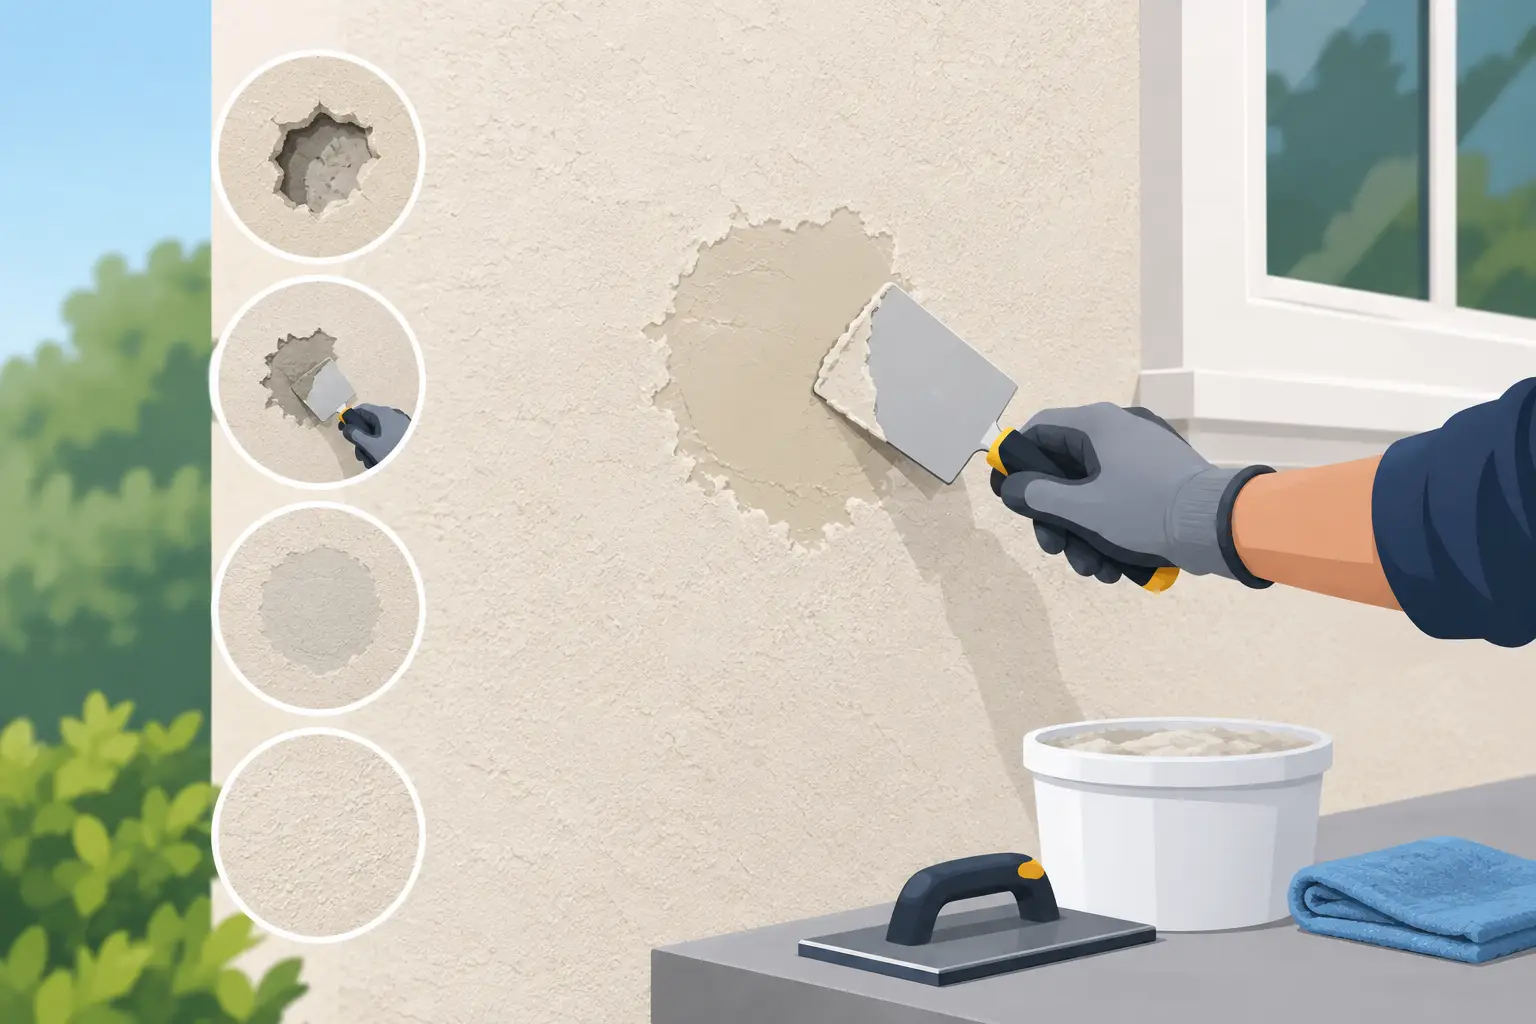
A small hole in stucco can look harmless until wind-driven rain, pests, or repeated heat cycles turn it into a larger exterior problem. Knowing how to patch stucco holes correctly means doing more than filling a void with caulk or patch compound. The repair needs a sound base, compatible material, enough curing time, and a finish that blends with the rest of the wall.
For El Paso properties, that last part matters. Intense sun, dry conditions, wind, and major temperature swings can expose a rushed repair quickly. A patch that is not properly bonded may crack around the edges, fade differently after painting, or allow moisture behind the stucco where it does not belong.
Start by Identifying the Hole and Its Cause
Before gathering materials, look closely at the damaged area. Small nail holes, screw holes, and shallow chips can often be repaired as a straightforward maintenance task. Holes left by removed fixtures, exterior wiring, hose reels, shutters, or old anchors may be larger and may have damaged the stucco beneath the surface.
The cause is just as important as the size. If the hole resulted from an impact, inspect several inches around it for loose, hollow-sounding, or cracked stucco. Press gently near the opening. Stucco that moves, flakes away, or sounds hollow when tapped may not be securely attached to the underlying lath or wall system.
A hole near a window, door, roof-to-wall transition, exterior light, or plumbing penetration also deserves extra attention. These locations can be tied to failed flashing, missing sealant, or water intrusion. Filling the visible hole without correcting the source can leave the property vulnerable to repeated damage.
Materials You Need for a Stucco Hole Repair
The right repair material depends on the size and depth of the hole. For very small surface holes, a quality exterior stucco patch product may be enough. Deeper holes generally need a cement-based stucco repair mix that can be built up in layers.
For a typical repair, have a stiff brush, putty knife or margin trowel, mixing bucket, clean water, sponge, spray bottle, exterior-grade patching mix, and sandpaper if needed. Keep primer and exterior paint available if the wall will be painted after curing. For larger holes, you may also need galvanized metal lath, corrosion-resistant fasteners, shears, and a bonding agent.
Avoid using interior drywall compound, lightweight spackle, or standard expanding foam as the finished repair. Those products are not designed to handle exterior exposure or match the strength and movement of stucco. Caulk can be useful around properly detailed trim joints, but it is not a substitute for cementitious stucco in an open wall field.
How to Patch Stucco Holes Step by Step
Clean and square up the damaged area
Remove loose stucco, dust, paint flakes, and broken material from the hole. A stiff brush works well for debris, while a cold chisel or utility knife can help remove weak edges. Do not simply patch over crumbly stucco. The new material is only as dependable as the surface holding it.
For a small hole, slightly undercutting the edge can help lock the patch into place. For a larger damaged section, create clean, stable edges around the repair area. If you uncover rusted metal lath, deteriorated wood, or wet sheathing, stop and address that issue before applying a cosmetic patch.
Dampen the existing stucco
Stucco is porous, especially in El Paso’s dry climate. If the surrounding wall is bone dry, it can pull moisture out of fresh patch material too quickly. That can weaken the bond and make cracking more likely.
Mist the edges and base of the repair with clean water. The wall should be damp, not dripping. On a hot day, it may need a second light mist shortly before application. Do not apply patch material to a surface that is hot from direct afternoon sun if you can avoid it. Work early in the day, in shade, or when temperatures are more moderate.
Apply a bonding agent when appropriate
A masonry bonding agent can improve adhesion between existing stucco and a new cement-based patch, particularly on larger or smoother repair areas. Follow the product instructions closely. Some bonding agents are brushed on and allowed to become tacky, while others are mixed into the repair material.
This step is not always necessary for a tiny nail hole, but it is often worthwhile when repairing a hole that is deeper, wider, or located in a weather-exposed area.
Fill deep holes in layers
For holes deeper than about one-quarter inch, do not try to fill the entire void in one heavy application. Press the repair mix firmly into the opening with a trowel, making sure there are no air pockets. Build deeper repairs in layers, allowing each layer to firm up according to the material instructions before adding more.
A large hole that exposes lath or the wall behind the stucco needs a more involved repair. The damaged area may need new galvanized metal lath secured to solid backing, followed by a scratch coat, brown coat, and finish coat. This is where a professional repair is often the better choice, because the wall’s moisture barrier and structural backing may need attention as well.
Keep the patch slightly below the finish plane
For small repairs, fill the hole nearly flush but leave enough room for the final texture coat. Flattening a thick patch perfectly smooth can make it stand out against textured stucco. The goal is to rebuild the wall plane first, then recreate the surface appearance.
Use a damp sponge or trowel to feather the perimeter into the existing wall. Work carefully. Overworking wet cement can bring excess water to the surface and weaken the finished patch.
Match the Texture Before the Patch Fully Sets
Texture matching is usually the hardest part of a stucco repair. El Paso homes and commercial buildings may have smooth trowel finishes, sand finishes, lace textures, dash finishes, or a custom hand-applied pattern. A repair can be structurally sound yet still look obvious if the texture is wrong.
Study an undamaged section of the wall before applying the finish coat. For a sand texture, use a matching sanded finish mix and lightly float the surface. For a knockdown or lace texture, apply material in a loose pattern, let it begin to firm up, then gently knock down the high points with a trowel. A rougher dash texture may require flicking or stippling material onto the wall with a brush or specialty tool.
Practice on a piece of cardboard or scrap board first if the patch is in a highly visible location. It takes less time to test the technique than to grind out a poor finish and start again.
Cure the Repair Instead of Rushing to Paint
Fresh stucco needs moisture to cure properly. In dry, windy weather, lightly mist the repair as directed by the product manufacturer. Protect it from direct sun when possible, but do not cover it tightly with plastic against the wall. Trapped moisture can create its own problems.
Curing time varies by material and weather conditions. Some premixed patch products can be painted sooner, while traditional cement-based stucco may require significantly more time. Read the label and do not paint just because the surface feels dry. Paint applied too early can trap moisture or lead to color variation.
When it is time to paint, use an exterior masonry primer if recommended, then apply a compatible exterior paint. Even when the color code is known, sun exposure can fade the original wall over time. Test the paint in a small area first, especially on south- and west-facing walls.
When a Stucco Hole Calls for Professional Repair
A do-it-yourself repair is practical for a few small, isolated holes in otherwise solid stucco. It is less practical when there are recurring cracks, multiple holes, soft wall sections, visible water staining, rusting lath, damaged sheathing, or openings around windows and rooflines.
Commercial properties should be especially cautious around penetrations for signs, conduits, lighting, and mechanical equipment. A small opening can affect the building envelope, and repairs may need to coordinate with waterproofing, painting, roofing, or exterior construction work.
For larger repairs, MAK Roofing & Construction can evaluate the full condition of the exterior rather than treating only the visible spot. That approach helps identify whether the repair is isolated or part of a larger moisture, flashing, or finish problem.
A clean stucco patch should protect the wall and disappear into the finish as much as possible. Take the time to prepare the opening, use exterior-rated materials, and let the repair cure on its own schedule. The result will hold up better through El Paso heat, wind, and the next stretch of changing weather.